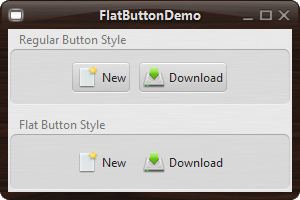
Sometimes there's a need to display buttons in a flat style - which means just like a regular toolbar button without any border and content filling, except when the mouse cursor is over the button.
As you maybe know, you can achieve this programmatically by adding a ChangeListener and modify border and content filling settings. However, in Synthetica you can specify an additional style and bind the style to the component by setting the component name. For regular UI-properties Synthetica supports so called named default properties by appending the component name. The lines below demonstrate how to do.
UIManager.setLookAndFeel("de.javasoft.plaf.synthetica.SyntheticaBlackEyeLookAndFeel");
UIManager.put("Synthetica.button.border.FlatButton", "standard/images/dummy.png");
...
  JButton button = new JButton();
  button.setName("FlatButton");
  //instead of #setName(), since V2.14 you can set the client property Synthetica.style
  //button.putClientProperty("Synthetica.style", "FlatButton");
Note: The specified dummy image is part of the Standard theme. The Standard theme is currently part of the core library but this will may be changed in a future release. Therefore it's not recommended to refer to the Standard dummy image, it's more save to provide your own empty image.


Instead of passing the style setting to the UIManager you can also create a custom XML file. The synth file below contains the declarations of the named default properties. Please note that the button name (FlatButtonStyle) is appended to the default property - that's what we call named default property and that's the way how static UI-properties become dynamic in Synthetica.
For loading simply override SyntheticaLookAndFeel#loadCustomXML() and load the custom XML file.
UIManager.setLookAndFeel(new SyntheticaBlackEyeLookAndFeel(){
  //since V2.12.1
  @Override
  protected void loadCustomXML() throws ParseException
  {
    loadXMLConfig("/demo/flatbutton/custom.xml");
  }
});

Download Demo Sourcecode
Note: The method above does not work with the Simple2D theme because Simple2D replaces the default button painter with a Java2D based painter. However, the code below can be used to achieve the same effect with Simple2D.
button.setBorderPainted(false);
button.addChangeListener(new ChangeListener()
{
  @Override
  public void stateChanged(ChangeEvent evt)
  {
    AbstractButton b = (AbstractButton)evt.getSource();
    boolean rollover = b.getModel().isRollover();
    b.setBorderPainted(rollover);
  }
});
Related Posts